
Why Test Fitting Comes First
Paint a fairing before checking that it sits on the bike and you may end up sanding off a finish you just paid for. Test fitting aftermarket fairings before paint catches problems while the panels are still bare and still easy to adjust. Fixing a misfit now costs an afternoon. Fixing it after the clear coat means stripping, repainting, and doing the same job twice.
Two problems cause most of the trouble. The first is tab alignment. If the tabs do not line up with the mounting points, the fairing pulls, flexes, or cracks once it gets hot on the road. The second is panel gaps. If the gap on one side is wider than the other, the bike looks off no matter how good the paint is. Both are cheaper to fix before the spray gun comes out.
This guide is for riders, aftermarket parts suppliers, and repair shops who want a repeatable way to check fitment, correct tab alignment, and even out panel gaps before any color goes on.
Tab Alignment Fundamentals: How Fairing Tabs Actually Seat
A motorcycle body panel attaches through a simple but precise interface. Fairing tabs are the molded pins or hooks that stick out from the back of a panel and lock it in place. Each tab is meant to push into a rubber grommet or plastic clip, which gives the panel a soft, secure hold that absorbs vibration instead of passing it along.
On OEM fairings, the tabs and their grommets are engineered as a pair. Tab diameter, length, taper, and insertion angle all match the receiving slot within a tight spec, so a genuine panel seats under light, even pressure. The tab slides home and the clip does the rest.
Aftermarket panels change the equation. Mold wear, material shrinkage, and parts copied from an already-modified original leave aftermarket tabs sitting slightly off, even when the panel looks correct from the outside. A tab that is a fraction too long, or angled a degree or two out of true, will not seat cleanly.
Tab alignment tolerance is the small amount of free play a genuine joint is meant to have. Bolt-up force is how you try to overcome a mismatch, and it is far harder on the parts than on you. Forcing a misaligned tab stresses the plastic, distorts panel gaps, and can crack the tab months later.
Verify tab alignment before any paint work. Once color is applied, every correction becomes rework, and sanding or reshaping a painted tab is an expensive mistake.
Confirm that every tab seats cleanly before you commit to color. The table below lists the tab problems you are most likely to run into.
Common Tab Alignment Problems When Test Fitting Aftermarket Fairings
Test fitting is where plans meet stubborn plastic. Before the first coat of paint, assemble the panels dry and watch for these six tab problems. Each one has a cause you can trace and a fix you can apply before the paint gun comes out.
| Common tab alignment issue | Root cause | Corrective action |
|---|---|---|
| Tab sits too high | Mounting point sits proud, or the panel was trimmed short along its lower edge | Shim the tab base with thin washers, or gently heat and re-form the tab downward |
| Tab blocked by a misplaced grommet | Rubber grommet pushed in off-center or installed in the wrong hole | Pull the grommet, reseat it square in the correct hole, and confirm the tab slides in flush |
| Misaligned clip stand | Bent or low-quality clip stand that drifted during molding | Straighten the stand, re-drill its locating hole, or replace it with a reinforced stand |
| Warped mounting point | Heat exposure, thin material, or stress from shipping | Warm the area evenly, clamp it back to true, and let it cool under load before test fitting again |
| Tab too short | Mold shrinkage or an over-generous trim on the mating surface | Build the tab up with plastic weld or a bonded spacer, then file to fit |
| Tab binds under load | Friction and flex once bolts are torqued, or a tab that is slightly oversized | Clearance the tab with a fine file, add a nylon washer, and torque fasteners gradually in a cross pattern |
How to read this table
Work from top to bottom instead of chasing one problem at a time. A tab that sits too high or too short is usually a symptom of a mounting point that moved, so confirm the anchor first. Grommets and clip stands are cheap to replace and often sit upstream of binding issues.
A quick workflow reminder
- Dry fit every panel with no paint and no sealant.
- Torque fasteners in a cross pattern so flex does not mask a bad tab.
- Fix the cause before you clearance anything, or you will trim a good tab to hide a bent stand.
Sort out tab alignment now and the panel gaps will stay consistent once the paint cures.
Measuring and Judging Panel Gaps During a Pre-Paint Test Fit
Panel gaps are the narrow, even spaces where two fairing pieces meet or sit against a fixed body part. Measuring them is one of the most reliable ways to judge an aftermarket kit. During a pre-paint test fit, the bodywork is mounted dry, with no paint or decals, so any misalignment can still be corrected while the fix is simple.
Where Panel Gaps Are Checked
Check gaps at the seams between the side fairings and the nose, around the headlight and air-intake openings, where the tail section meets the seat unit, and along the belly pan or lower cowl. On multi-piece front ends, the line from the windscreen down to the front fender deserves the same attention. A thin gauge, or a finger run along each seam, will reveal high and low spots.
What Consistent Gaps Tell You
When a gap stays even from one end of a seam to the other, fairing alignment is correct. The panels sit at matching heights, the edges run parallel, and the mounting points share the load. Consistent gaps also mean the fasteners are not stressed and the finished paint line will read straight. It is the clearest sign that a test fit has passed.
Why Uneven Gaps Point to Tab or Bracket Problems
Uneven gaps are a warning. A seam that widens along its length usually means a tab is bent, too long, or missing, or that a bracket is mounted in the wrong position. A pinch point can indicate a tab that is too thick or a panel pulled out of place. Catching either before paint saves you the cost of refinishing a part that never fit properly.
The table below shows acceptable and maximum gap ranges for the most common fairing seams, so a measured gap can be judged quickly.
| Fairing Seam | Minimum Acceptable Gap | Maximum Acceptable Gap | Absolute Maximum Gap |
|---|---|---|---|
| Nose-to-side fairing | 1.5 mm | 3.0 mm | 4.0 mm |
| Headlight surround | 1.0 mm | 2.5 mm | 3.5 mm |
| Tail-to-seat unit | 2.0 mm | 4.0 mm | 5.0 mm |
| Belly pan seams | 2.0 mm | 4.0 mm | 5.0 mm |
| Windscreen-to-upper cowl | 0.5 mm | 2.0 mm | 3.0 mm |
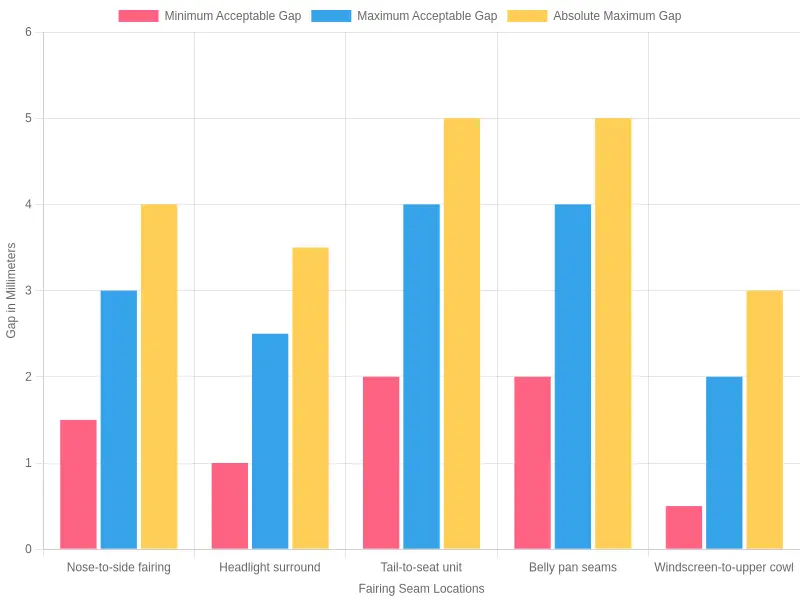
A seam inside its acceptable range can be approved. A seam that exceeds the absolute maximum, or varies sharply along its length, should be reworked before paint.
The diagram below shows how a tab seats into its grommet or clip. The tab should slide straight into the opening, not be forced at an angle; the alignment guide lines mark the seating point the tab must reach for the panel to sit flush.
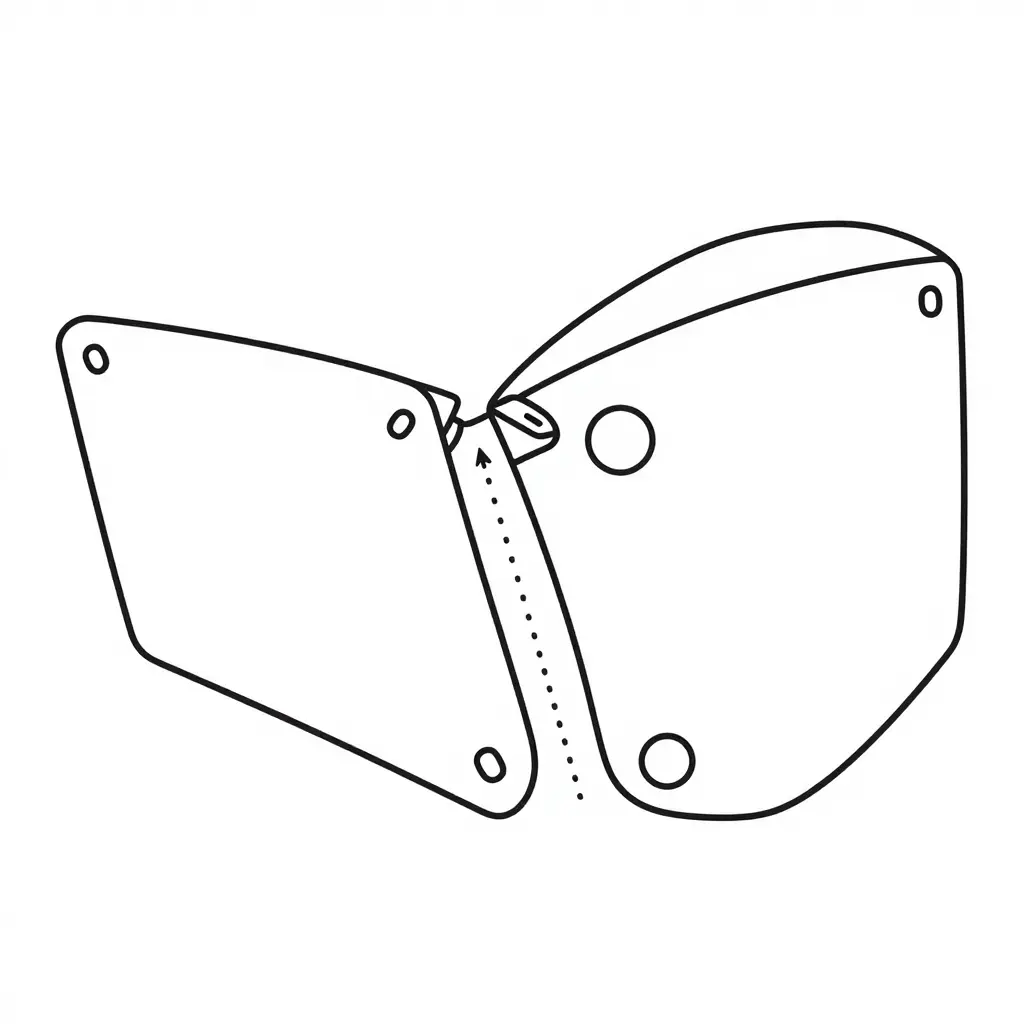
Keep that seating relationship in mind when you test fit aftermarket panels. A tab that stops short of its grommet, or sits crooked in the clip, causes a large share of stubborn panel gaps. Check every mounting point against the layout here before any paint work begins.
Pre-Paint Test Fitting Workflow for Aftermarket Fairings
Skipping the dry run is the fastest way to waste a fresh paint job. Work through these steps in order and you will catch fitment problems while they are still cheap to fix.
- Set up a clean, padded workspace and arrange every fairing piece in the order it will be installed, so the first dry fit does not scuff the surfaces.
- Dry fit all panels onto the bike before any paint work, mounting each section by hand to see how the set behaves as a complete unit rather than piece by piece.
- Check tab seating by pressing every mounting tab fully into its slot and feeling for firm, flush contact. A tab that hangs loose now will rattle at speed later.
- Verify tab alignment across neighboring panels, confirming each tab lines up squarely with its receiver and that none is bent, twisted, or forced to stretch for reach.
- Confirm grommet positions by tracing every rubber grommet and metal collar, then reseat any that sit off-center to prevent vibration wear once the bike is back on the road.
- Inspect panel gaps along each seam, comparing left against right and top against bottom to spot width differences that point to a bent bracket or a warped molding.
- Mark problem areas with painter’s tape or a grease pencil, labeling each spot where a gap runs wide, a tab binds, or a bolt hole refuses to line up.
- Correct alignment by loosening the affected brackets, trimming only the tabs that genuinely need it, and shimming mounts until the panel settles without tension.
- Refit the complete set once corrections are done, repeating the dry-fit checks to confirm the fixes hold and that tabs and seams now behave consistently.
- Do one final walk-around while the fairings are mounted or loosely attached, then pull them off for paint only after the fit proves repeatable.
A patient test fit before paint saves you from repainting scratched panels and chasing rattles down the road.
Reading the Numbers
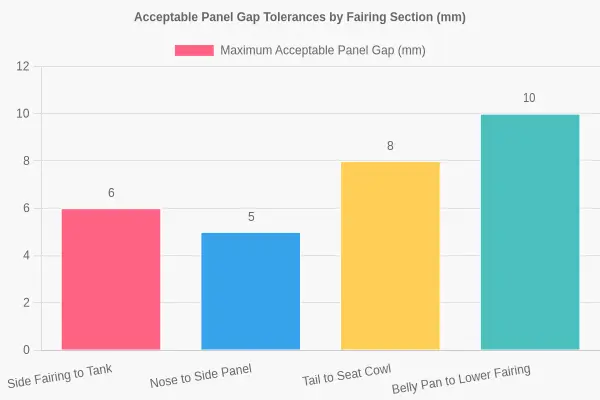
When you dry-fit aftermarket fairings before paint, “close enough” is not a spec. The tolerance table above sets a practical ceiling for panel gaps at each major joint, in millimeters. The belly pan and the tail-to-seat unit tolerate the most movement: keep them at or below 4.0 mm, with 5.0 mm as the absolute limit. The nose-to-side fairing seam is the most exposed and the most scrutinized, so hold it under 3.0 mm and treat 4.0 mm as the point that forces rework. The windscreen-to-upper cowl joint is the tightest, with a 2.0 mm target and a 3.0 mm ceiling.
Treat these figures as maximums, not targets. A gap you measure now will only grow as tabs settle, heat cycles kick in, and paint adds a thin layer of build. If a joint is already at its upper limit during the test fit, reshape the tab or shim the mount before you reach for the spray gun. Fixing geometry after the color coat means sanding back fresh paint you just paid for.
Correcting Misaligned Tabs Before Paint
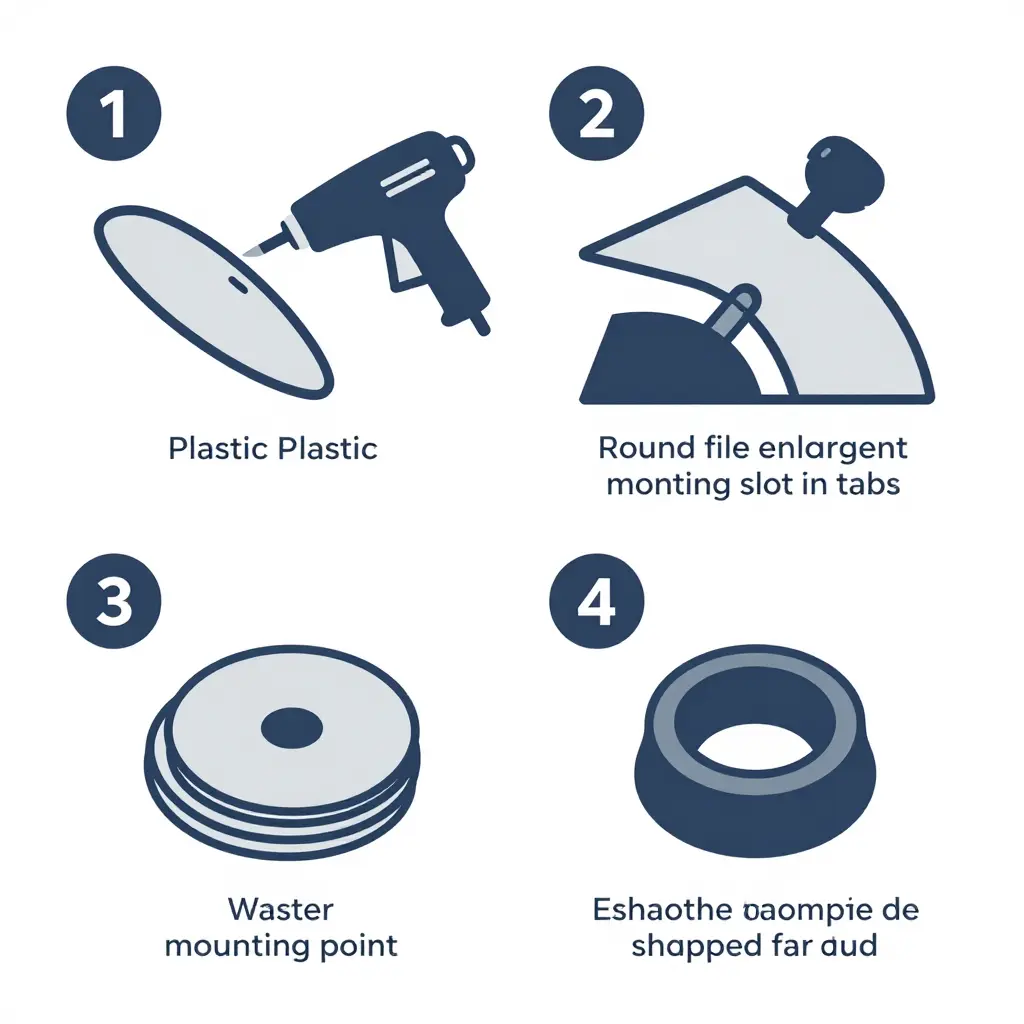
Getting tab alignment right is the difference between a fairing that clicks into place and one that fights you every time you touch it. Most alignment problems are fixable, and they should be fixed before any finishing work begins. Once paint is on, every correction risks cracking or chipping the surface you just perfected.
Gentle Heat-Assisted Adjustment
Many aftermarket fairings arrive slightly warped from shipping or from the mold itself. Low, even heat from a heat gun lets the plastic relax enough to be nudged into position. Keep the nozzle moving, apply light pressure, and let the material settle until the tabs line up. Overheating distorts a panel permanently, so work slowly rather than forcing it.
Minor Slotting or Filing
Sometimes a mounting hole sits a few millimeters off. Enlarging the slot slightly with a round file or rotary tool gives the fastener room to seat without stressing the panel. Remove material in small increments and check the fit often. These small adjustments are what close sloppy panel gaps once everything is assembled.
Shimming at Mounting Points
When a panel sits too close to or too far from its neighbor, thin shims at the mounting points restore even spacing. Plastic or rubber washers work well and can be stacked to dial in the exact offset. Shimming preserves the original hardware while correcting stubborn misalignment.
Swapping Incorrect Grommets or Clips
Wrong or worn grommets and clips are a frequent cause of poor tab alignment. Aftermarket kits sometimes ship with hardware that does not match your bike’s tolerances. Replacing it with the correct size often solves the problem outright, with no cutting or heating.
Fix all of this now and you paint once and assemble cleanly. With alignment handled, the next question is the surface itself and the material choices that determine how long the finish lasts.
The Alignment Adjustment Process at a Glance
Before you mix paint, treat tab alignment as a small troubleshooting loop rather than a one-time step. The flowchart below walks through it: check how the new panel seats against the frame, identify any mismatch between the tab and its mounting point, choose an adjustment (shim, slot, or gentle persuasion in the right spot), then re-check the gap to confirm you have not simply chased the problem around the fairing.
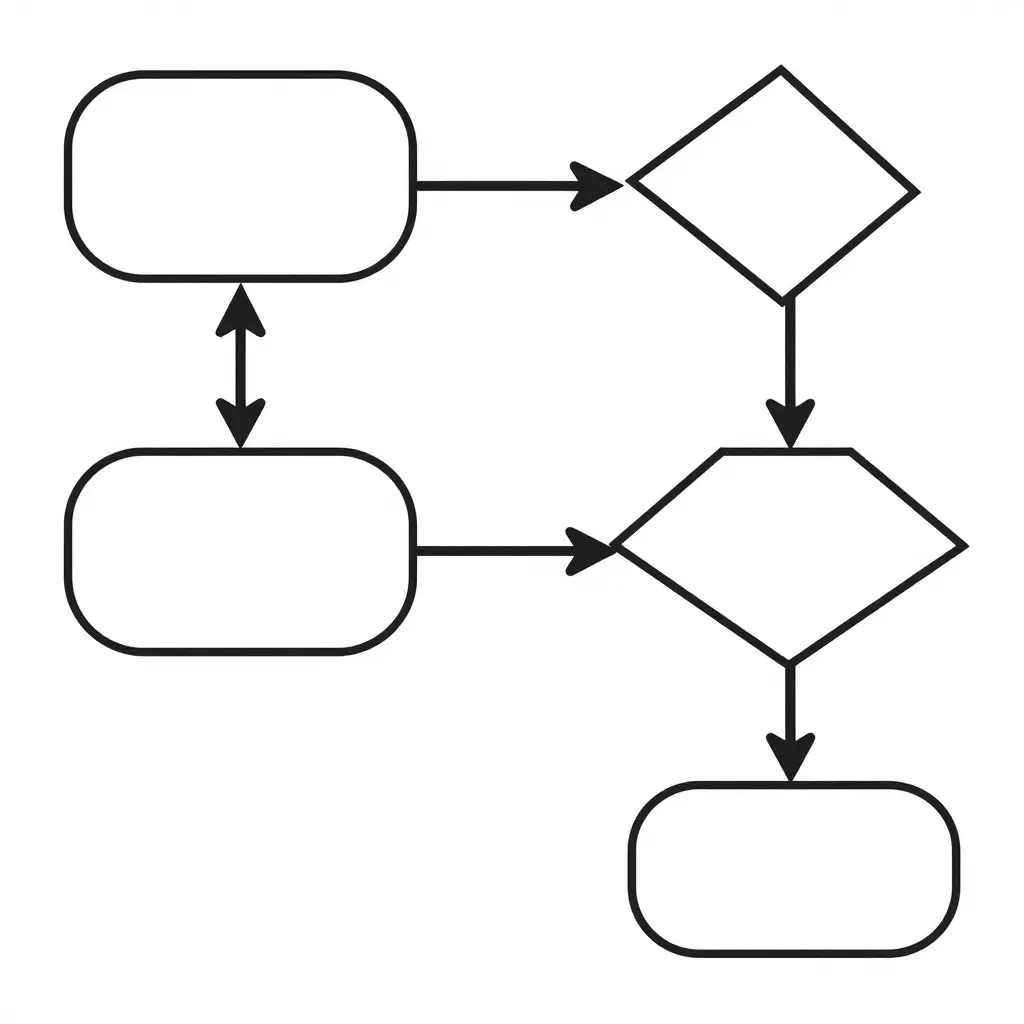
Read it left to right and top to bottom, treating each diamond as a checkpoint. If the panel seats cleanly the first time, you skip the adjustment step. If it does not, isolate the mismatch, apply one correction, and loop back to re-measure. Keeping the loop tight – adjust once, then re-check – prevents the classic mistake of stacking tweaks until nobody remembers which change actually fixed the fit.
What Actually Causes Those Stubborn Panel Gaps?
If you have bolted a fresh set of aftermarket fairings onto a bike and stepped back to spot a lopsided gap along the headlight shroud, you already know the frustration. That “almost fits” moment is why a pre-paint test fit matters. Catching the problem before the spray gun comes out saves you from sanding, repainting, and remounting parts that were never going to line up.
Not every gap has the same source. A handful of causes show up again and again, and their rough shares are worth knowing because they tell you where to spend your troubleshooting time first.
Where the Gaps Usually Come From
- Tab misalignment (30%) is the largest share. Tabs that are twisted, molded off-center, or drilled in the wrong spot pull panels out of plane before you even tighten the fasteners.
- Grommet position errors (22%) come next. A rubber grommet a few millimeters off shifts the whole panel seating point and creates a gap that wiggling will not close.
- Warped panels (18%) usually trace back to manufacturing, storage heat, or shipping pressure. A panel that left the factory slightly bowed will fight you at every mounting point.
- Incorrect hardware (16%) is easy to miss. A wrong-length bolt, a missing shoulder washer, or an oversized clip all change how deeply a panel pulls down.
- Bracket flex (14%) accounts for the rest. Thin or unsupported brackets bend under load, so the gap appears or disappears depending on how tightly you torque things down.
Why the Proportions Matter
The top two causes together account for more than half of all gap complaints. That is useful, because tab misalignment and grommet positioning are also the easiest to fix with careful measurement and patience. Most of your problems live in the category you can control without replacing parts.
The smaller shares are not less important. Incorrect hardware and bracket flex tend to hide behind the bigger issues. You fix a tab and a gap appears elsewhere because a bracket was flexing the whole time. That is why a methodical test fit, checking one mounting point at a time, beats tightening everything and hoping.
Turning the Data Into a Game Plan
Start with the tabs. Dry-fit each panel, mark the misaligned tabs with tape, and adjust before final assembly. Then verify grommet placement against the mounting holes. Once those two are dialed in, inspect the panel itself for warping and confirm every piece of hardware is the correct length and type. Finish by testing bracket rigidity under load, since flex only shows itself when the fairing is fully seated.
Work down the list from the largest share to the smallest and you will solve most gap issues in a logical order instead of chasing them around the bike. A clean test fit now means a finish that holds up later.
FAQ: Test Fitting Aftermarket Fairings Before Paint
How long should a test fit take?
A proper test fit aftermarket fairings session usually takes one to three hours for a full set, depending on how many panels are involved and how far off the mounting points are. Rushing it to thirty minutes almost always hides problems that resurface after paint, when corrections become expensive. Work panel by panel from front to rear, and allow extra time the first time you dry-fit a new brand or mold.
Do all fairings need a test fit?
Yes. Every panel should be dry-fitted before any paint or clear coat goes on. Even parts sold as a complete kit can vary slightly between production runs, and tab alignment issues tend to show up on specific panels rather than the whole set. Fitting everything together once, unpainted, confirms how the pieces interact and shows where trimming or slot adjustment is needed.
How tight should panel gaps be?
Panel gaps should be consistent and even, typically between 1 and 4 mm on most sportbike bodywork, with the tightest seams at the windscreen and headlight. The goal is uniformity rather than one exact number; gaps that match side to side look intentional, while uneven spacing looks damaged. Check gaps at the nose, mid-fairing, and tail, and adjust the mounting order until the spacing reads evenly from several angles.
Can tabs be adjusted after paint?
Adjustments are possible after paint, but they carry risk. Sanding, drilling, or heating a painted tab can crack the finish and force a repaint of that panel. That is why the test fit matters: bending, slot widening, and shimming should all happen on bare plastic. If a change is unavoidable after paint, work slowly and protect the surrounding edges.
How do you fix tabs that will not seat?
First work out whether the tab is too long, too thick, or misaligned with its slot. Common fixes are trimming excess material, slightly widening the receiving slot, using heat to reshape the tab, or adding a thin shim to correct depth. File a little at a time and re-check before removing more material. Once the tab seats cleanly without force, the part is ready for prep and paint.
Final Thoughts: Test Fit First, Paint Later
Test fitting aftermarket fairings before paint is one of the cheapest steps in a build. A few minutes spent checking tab alignment and panel gaps on bare plastic costs far less than stripping and repainting a set that never sat flush. Small gaps that hide during a dry run become obvious, and permanent, once a glossy finish locks them in.
At summitfairings.com, a motorcycle fairing export site, that logic drives everything we do. We stock over 3,000 styles covering almost every motorcycle model, so riders and shops can find an exact match fast. Buyers pay 10-40% less than on other sites, and our team answers within six hours, so fitment questions never stall a project.
Checking tab alignment early confirms every mounting point lines up before hardware goes on. Measuring panel gaps on bare fairings catches warping, misdrilled holes, or shipping damage while fixes are still cheap. Together, the two checks turn a potentially expensive repaint into a quick adjustment.
Whether you run a repair shop or work in your own garage, the rule is the same: dry fit, verify, adjust, then paint. That order protects your budget and produces a finish that looks factory-correct from every angle.
Related Resources
- Browse a current selection of apparatus and emergency vehicles on the fire trucks for sale page, ideal for departments upgrading or expanding their fleet.
- Explore the history, specs, and restoration potential of a classic American LaFrance fire engine for sale, a favorite among collectors and enthusiasts.
- See how crews stay synchronized during large-scale incidents with this guide to unified command in emergencies.
- Understand why rugged construction matters by reading about the benefits of heavy-duty steel fire apparatus built to withstand punishing conditions.
- Discover emerging tools and tactics for unusual hazards in this look at innovations in fire safety and the challenge of zombie fires.