
Drawing a fire truck can inspire creativity in aspiring artists, young firefighters, and fire truck enthusiasts. This guide offers a straightforward approach to crafting your own fire truck design, taking you from initial sketches to colorful enhancements. We will delve into a detailed step-by-step guide on how to draw a fire truck easily, share essential tools to enhance your artwork, highlight common pitfalls to avoid, and inspire you with creative ideas for customizing your fire truck drawing. Prepare to unleash your creativity and connect with the vibrant world of firefighting through art!
From Rough Lines to Brave Reds: A Gentle, Step-by-Step Path to Drawing an Easy Fire Truck
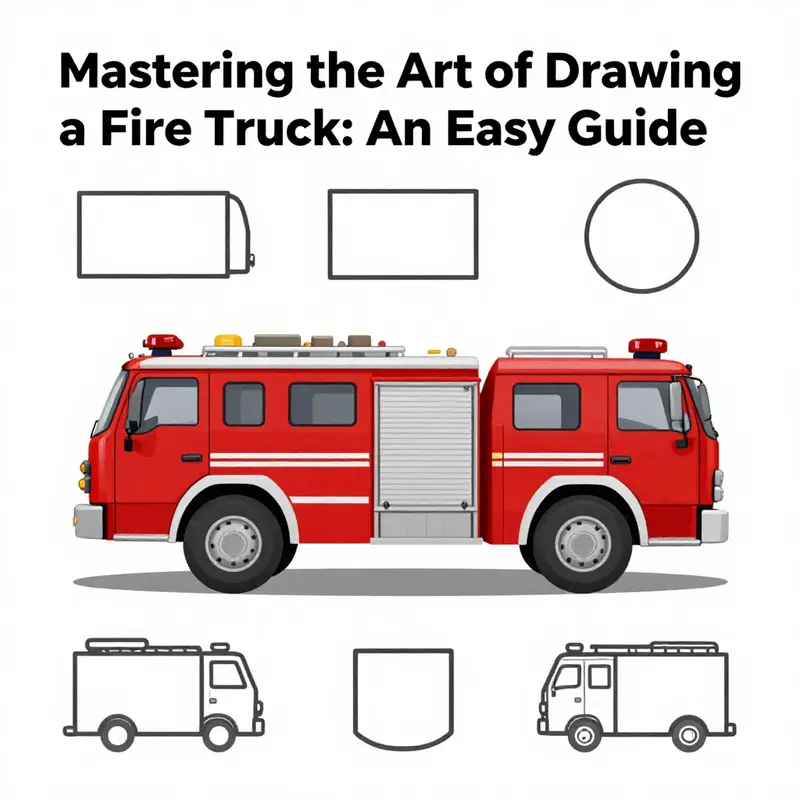
Drawing can be a calm, almost meditative act when you break it down into simple steps. This chapter offers a clear, cohesive path from the first pencil mark to a finished, kid-friendly fire truck. The aim is not to craft a perfectly engineered vehicle but to capture the recognizable essence of a fire truck with minimal fuss. The approach is deliberately friendly to beginners and especially welcoming to young artists who are just discovering how shapes become objects. As you read this, imagine you are tracing a friendly, red silhouette across a piece of paper, learning as you go, and letting your confidence grow with each incremental shape you add.
Begin with the most fundamental idea: a fire truck is a sturdy, elongated shape with a distinct driver’s cab on one end, a long body for the storage and water apparatus, and a pair of wheels under the corners that anchor the whole profile. The simplest way to start is with a rectangle for the main body and a smaller rectangle or square for the cab, placed at the front. Let your hand hover above the page and sketch in light, loose lines. The goal here is not precision but a sense of proportion, so give yourself permission to erase and adjust. A gentle strategy is to first draw a rectangle to serve as the main body; on the left, tucked in, add a smaller square or rectangle for the cab. If you’re unsure about angles, start with right angles; you can soften junctions later to convey the sturdy, practical lines of a real vehicle.
When the cab sits comfortably at the front of the larger rectangle, it’s time to suggest the roof line with a simple, small triangle on top. This tiny triangle creates the characteristic peaked look of many traditional fire trucks and helps the vehicle read immediately as something purposeful and familiar. Keep your lines light at this stage. You’ll come back with darker strokes later to define the final shape. Think about the perspective you want to convey: the front is slightly angled toward the viewer, while the body stretches back. A little foreshortening makes the truck feel more three-dimensional even in a simple drawing, and it is easy to achieve with small adjustments to the cab’s width and the body’s length.
Next come the windows. Draw a large rectangle across the cab to represent the windshield. On the sides, add two smaller rectangles for the side windows. The windows are important because they give life to the driver’s area, and their spacing matters for a balanced composition. A practical tip for beginners: keep the vertical edges parallel and the horizontal lines straight. A simple horizontal line across the top of the cab can act as a roof rail, which is a subtle detail that adds realism without complicating the drawing. Don’t worry if the lines aren’t perfectly straight at first. You can refine them with a darker stroke once you’re happy with the overall scale.
With the cab in place, shift your attention to the wheels. Fire trucks usually have two wheels near the cab and two larger wheels toward the back, giving the silhouette a grounded, powerful stance. Sketch two circles beneath the front corners of the cab for the front wheels, and then two slightly larger circles or rounded ovals behind the main body for the rear wheels. Inside each wheel, add a small circle to indicate the hubcap. Guideline marks can help keep wheels level and evenly spaced; light, faint circles let you adjust the wheel base as needed before committing to darker lines.
The long body or water tank follows. Draw a longer rectangle extending from the back of the cab; this will serve as the main body where equipment and water storage sit. To signal the hose storage area without overcomplicating the drawing, add a gently curved or angled shape along the top edge of this rectangle. This curved section hints at a compartment or hose rack, a small but telling detail that transforms a plain rectangle into a convincing vehicle. As you add this part, keep the lines clean and straight. A sturdy silhouette will carry the drawing forward, making the later details easier to place with confidence.
If you wish to incorporate a ladder, the simplest approach is to sketch two vertical lines on the side of the truck and connect them with several horizontal rungs. Ladders are an iconic feature of fire apparatus, so placing a clear ladder on the side makes the vehicle immediately recognizable. The ladder doesn’t have to be overly complex; in fact, a clean, three-to-five rung ladder is often enough to convey function and character. Position it where it feels natural and aesthetically balanced with the rest of the body, usually along the side facing the viewer. You can leave a little space between the ladder and the cab to keep the composition from looking crowded.
Details on the cab and along the top of the vehicle bring the drawing to life. Draw a small rectangle or square on top of the cab for the siren and flashing light. Fire trucks rely on bright, attention-getting lights, so a couple of tiny shapes near the siren add sparkle without complicating the frame. For headlights, place small squares or circles toward the front corners of the cab. A simple circular or spiral motif on the side can suggest the hose nozzle or a hydrant connection. The key here is not to overdo the embellishments; a handful of well-placed marks can convey the gear and equipment clearly and realistically.
As you near completion, shift your focus to the outline and shading. Go over the entire drawing with a darker pencil or pen to bolden the edges and unify the composition. Erase the initial construction lines gently so the final form remains crisp and readable. Color can then follow. Traditional fire trucks are red, a choice that instantly signals the vehicle’s purpose. Consider adding yellow or white stripes along the sides for visibility, and color the lights bright red or blue. The wheels are typically black or dark gray, and you can sprinkle a little shading along the undersides to ground the truck in space. If you enjoy adding a bit of atmosphere, you might sketch a small smoke plume or a flame silhouette in the background, but keep it light and unobtrusive so the truck remains the central focus.
What makes this process especially approachable is the emphasis on form first, details later. By modeling the fire truck with basic shapes—rectangles for the body and cab, circles for wheels, and a few simple lines for the ladder and equipment—you avoid getting overwhelmed. This approach mirrors how many artists learn to see the world in terms of shapes and relationships rather than as a collage of small, complex parts. When you practice, you’ll notice your measurements become more confident, and your lines more decisive. If a line isn’t where you want it, erase and try again. The age of the artist does not dictate the outcome; a steady, patient approach does.
As you become more comfortable with the steps, you can experiment with variations. You might tilt the cab slightly to give the truck a more dynamic stance, or adjust the proportions so the water tank dominates the silhouette a bit more, depending on whether you want to emphasize speed, power, or balance. The ladder can be drawn on the rear or the side, depending on what looks best with your chosen perspective. One charming option is to add a tiny firefighter figure standing beside the truck, waving or saluting, to create a moment of life and purpose in your scene. These small additions keep the practice enjoyable while reinforcing the idea that drawing is a form of storytelling as well as representation.
For those who crave a deeper sense of structure, a quick, gentle reminder helps: practice a few simple rounds focusing on one element at a time. First, master the cab’s shape and the roof line. Then refine the windshield and windows. Finally, lock in the wheels and the long body. With each pass, your lines become more confident and your composition more cohesive. If you’re color-minded, pick a palette you love and test it on the truck. Bright reds with yellow trims catch attention, while white trims can create a crisp, modern look. If you’re feeling bold, you could even add a small reflection on the surface of the truck to convey light catching metal, which adds a touch of realism without complicating the drawing.
The beauty of this method lies in its accessibility. It invites beginners to engage with a subject that feels both exciting and friendly. The fire truck is a symbol of help and teamwork, and drawing it provides a chance to connect with those values through a hands-on activity. It also creates a bridge to other topics—vehicle shapes, color theory, and even basic perspective—that you can explore as you grow more confident. If you’re sharing your art with others, a gentle caption can finish the piece nicely. Something like, “Learning with simple shapes” or “Red lines, bright help” keeps the tone encouraging and light, reinforcing that practice is the main driver of improvement rather than perfection.
For readers seeking more guided demonstrations, you can explore additional tutorials that reinforce the same ideas and offer a different angle on the same subject. If you’re curious to see more examples or longer explanations, consider visiting our broader resource hub at firetruck.space/blog/. The site hosts a variety of art tutorials and examples that align with the simple, shape-based approach described here, helping you build a library of quick-start techniques that you can return to again and again. By engaging with a handful of these exercises, you’ll notice your ability to simplify complex forms into clean, readable shapes steadily improving, which in turn reduces the stress of drawing and multiplies the fun. firetruck.space/blog/
As a closing thought, remember that the joy of drawing comes from curiosity and consistent practice. Each line you lay down is a step toward a more confident skill set, not a final, flawless product. Your fire truck can be bold, bright, and charming even in its simplest form. The goal is to enjoy the process, learn a little with every stroke, and let your own style emerge from this steady, step-by-step method. If you’d like a compact visual aid to accompany these steps, a quick video can provide a complementary perspective on proportions and sequencing. A helpful resource is available here: https://www.youtube.com/watch?v=9dKJtXqUZuE. This video offers a brief, beginner-friendly demonstration that aligns with the approach outlined in these pages without overwhelming new artists. It serves as a supplementary guide for visual learners who benefit from seeing the sequence in motion.
With patience and a sense of play, you’ll find that drawing a fire truck can be a straightforward, enjoyable project. The shapes become familiar friends, the lines carry confidence, and the final image, whether a simple sketch or a more polished piece, carries the warmth of a child’s achievement. Each time you pick up the pencil, you’re not only practicing a technical skill but also nurturing observation, composition, and a quiet persistence that will serve you across many kinds of art. The road from a rough line to a finished red vehicle may be short, but it is a path that teaches balance, proportion, and the delight of creation. And when you share your drawing with someone else, you offer a moment of connection—an invitation to see the world through your eyes, one easy step at a time.
Tools in Hand: Essential Materials for an Easy Fire Truck Drawing
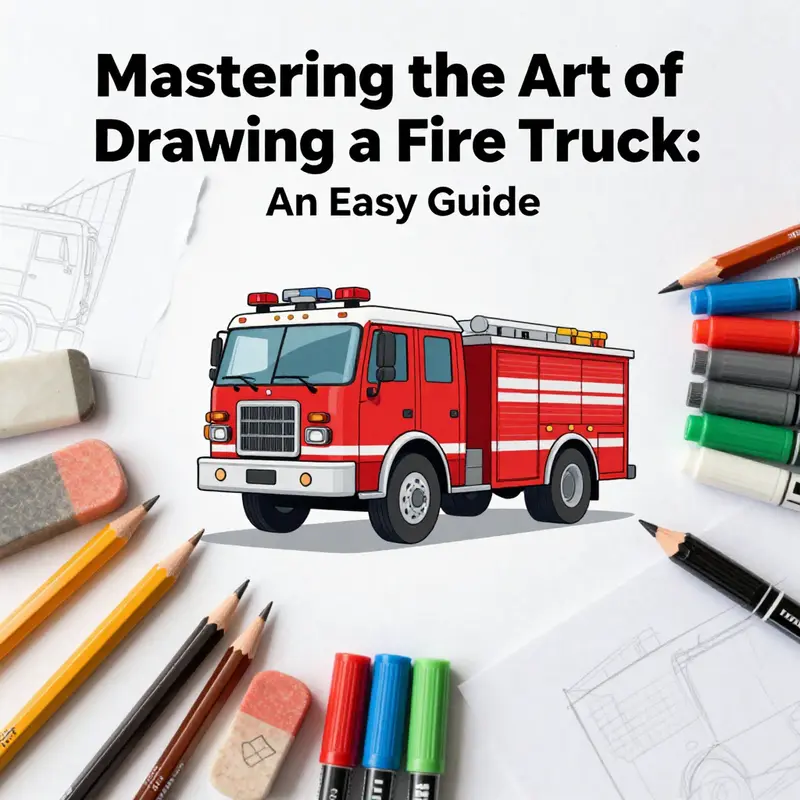
Holding a pencil, a clean sheet of paper, and a handful of simple tools can transform a vague idea into a confident, kid-friendly fire truck drawing. The core of an easy approach isn’t just about the lines you draw but the materials you choose and how you use them to guide your hand. When a beginner learns to sketch a fire truck, the goal is not to chase perfection but to create a clear, recognizable shape through deliberate, forgiving steps. With the right set of tools, a child or a first-time illustrator can move from tentative scribbles to a sturdy, colorful image that captures the essence of a fire engine: a strong rectangular body, a shorter cab at the front, two sturdy wheels below, a ladder or platform resting along the top, and the telltale siren glimmering atop the cab. The tools you select become part of the quiet, encouraging rhythm of drawing. They help you see the truck as a collection of simple forms you can control, transform, and eventually refine into something you’re proud to show.
Begin with the most basic instruments: a pencil and an eraser. A standard graphite pencil lets you lay down light, easily adjustable lines that serve as a scaffold for your final drawing. An eraser isn’t merely a correction tool; it’s a partner in your creative process. It invites you to test, adjust, and refine without fear of permanent mistakes. When you begin, you can sketch the main rectangle for the body with loose, elongated strokes and then add the cab as a smaller block that meets the body at an angle, ensuring the proportions look balanced. The eraser’s soft touch helps you nudge the lines until you’re satisfied with the overall silhouette. The beauty of this early stage is that everything remains reversible. You can redraw a line or reposition a wheel if the perspective feels off. In the context of an easy-fire-truck study, that flexibility is as important as any final color.
Next comes the surface you’ll work on. Drawing paper or a sketchbook with a smooth texture provides an even plane for your pencil to glide. A4 or letter-size sheets are perfectly adequate for beginners, offering a comfortable size to maneuver without losing scale. A slightly textured paper can add a bit of bite to the pencil, which helps children see where their lines land and how they connect to the shapes they’re forming. If you’re using colored pencils or markers later, the paper choice can influence color saturation and how cleanly you can apply each line. A bright white sheet often feels more inviting to young artists, inviting them to experiment with bold strokes and vibrant hues.
While the pencil forms the backbone of the drawing, a ruler becomes the quiet tutor for precision. It’s optional, but drawing straight lines—especially along the body’s edges or the ladder’s rail—helps establish a confident, geometric foundation. The ruler teaches proportion in a gentle way: parallel lines that stay true over long distances reinforce the truck’s sturdy look. If you’re feeling comfortable by this stage, you’ll notice that the ruler doesn’t erase the joy of freehand drawing; it simply anchors your major edges so the rest of the details can sit on a solid frame.
Color adds life to the scene and helps young viewers instantly recognize the subject. For the body of the fire truck, red remains the instinctive choice, a color that signals urgency and purpose. With a simple palette, you can create a striking image without overwhelming the eye. In addition to the main red, introduce yellow or white highlights for shine, windows, and light reflections. The cab windows can be indicated with a few short, horizontal lines, and the windshield can be suggested with a small rectangle or an angular shape on the top front. The roof equipment—a long box that hints at the ladder or platform—can be shaded lightly to suggest its elevated presence. On the side of the main body, a flatter, elongated rectangle can become the water tank or storage area, which helps communicate the truck’s function even at a glance.
For color, there are several safe and straightforward options that don’t overwhelm a beginner. Colored pencils offer controllable, layered color that’s easy to blend. Markers provide bold, uniform color that makes the fire truck pop off the page, especially when you keep the lines clean and the shapes simple. Crayons are wonderful for younger artists or more textured looks, and they fold neatly into a quick, friendly version of the subject. The key to a cohesive result is limiting the palette and spacing the colors so each feature reads clearly. A bright yellow or white can serve as a trim or accent to suggest lights and reflective surfaces, while a darker shade of red can add depth to the main body.
Beyond color, some artists enjoy subtle tools that help with shading and depth, though they’re not essential for an easy rendition. A blending stump or a soft tissue can smooth color transitions for a gentle gradient along the truck’s curves. A light touch with a graphite shading pencil can hint at shadows under the cab and along the wheels, giving the drawing more dimension without complicating the method. If you’re exploring this extra step, remember to build slowly: shading should be light and gradual, not heavy or abrupt. The aim remains clarity and recognizability, not photorealism.
As a beginner-friendly philosophy, this approach emphasizes process over polish. Start with a faint sketch of the basic shapes and then slowly add details. The sequence works well: lay out the main body, add the cab, place the wheels beneath, and then sketch the ladder or platform along the top. The siren and lights are small features, but they carry a lot of visual weight because they cue the viewer’s eye and energy. A tiny circle or rounded rectangle on the cab can stand in for the siren, with a few small dots or triangles around it to imply flashing lights. A tiny rectangle atop the cab can signal the windshield angle, helping the observer read the driver’s space at a glance.
When you feel ready to move beyond the sketch, trace the final lines with a darker medium—perhaps a fineliner or a darker pencil line—then carefully erase the underlying construction lines. The moment you commit to a single, confident outline marks a turning point: the drawing shifts from a plan to a solid image. It’s here that many beginners discover the joy of illustration. The straightforward geometry of a fire truck—the big rectangle for the body, the smaller rectangle for the cab, the circle wheels, and the slim ladder—becomes a friendly playground for practice.
The internal choice of tools can also influence the pace of this journey. The simple set of pencil, eraser, paper, and optional ruler is accessible to almost everyone and leaves room for experimentation. If you want to add a dashed line to suggest a reflection or a subtle gradiation along the truck’s side, you can do so with a sharpened pencil, keeping the line faint so it doesn’t overpower the main shapes. The more you work with a light hand and patient repetition, the more confident your lines will feel and look.
For those who like a little guided structure, a quick, beginner-friendly demonstration can be invaluable. Watching someone draw step by step reinforces the value of resting each new piece on the previous one. It is not necessary to imitate every detail of a real fire truck; rather, the goal is to understand how a few simple shapes can convey the idea of a complex vehicle. The strategy here is to build confidence by mastering a repeatable process: outline, refine, erase, color, and finish with a clean, bold presentation that makes the vehicle instantly recognizable.
Within this chapter you’ll find a gentle invitation to explore, but you’ll also find a practical roadmap. The right tools do more than translate intention into marks on paper; they accelerate learning by providing immediate feedback. When a line sits where you intended, you gain momentum. When a color choice lands well, you feel encouraged to push a little further. The essential toolkit described here—pencil and eraser, paper, optional ruler, and a versatile color set—encourages beginners to experiment without fear. It also helps remind experienced beginners that the fastest path to a satisfying drawing is often the simplest path: a few steady shapes, correct proportions, and well-timed color that breathes life into a friendly, easy fire truck.
If you’d like more guided ideas and a visual companion to the steps described here, explore additional beginner-friendly guides on the Fire Truck Blog. You can find a wealth of practical tips and examples that align with the easy drawing approach discussed in this chapter. For more beginner-oriented content, check firetruck.space/blog/.
As you close the page of this chapter, carry with you a sense of quiet confidence. The tools in your hand are not merely instruments; they are your partners in a creative process that invites you to see a simple vehicle through a series of forgiving decisions. The fire truck you draw can become a friendly, recognizable figure on the page—red, bright, and ready to roll in your own imaginative world. With the right materials, a careful plan, and the willingness to practice, you can turn a basic rectangle into a characterful machine that captures the spirit of rescue and teamwork embedded in every fire engine.
External resource: https://www.youtube.com/watch?v=9Q7jV0XkLbI
Avoiding Proportional Pitfalls: A Clear Path to Drawing a Fire Truck
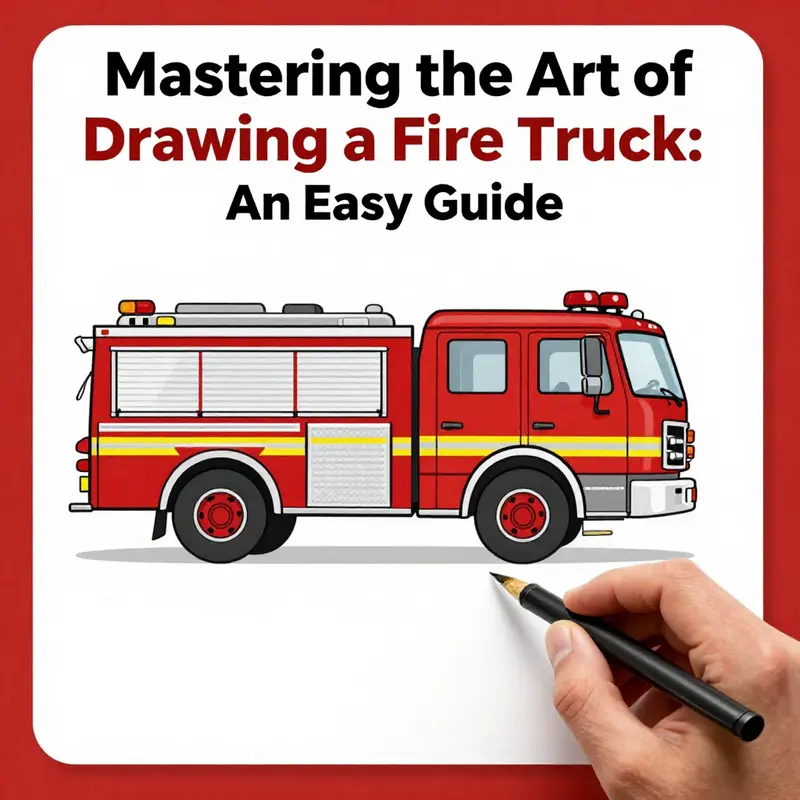
When a child or beginner sits down with a pencil and a blank sheet, the first instinct is to draw a recognizable silhouette. The impulse is strong to fill in the cab, the long body, and the wheels before the proportions feel right. The easiest way to improve a fire truck drawing is not missing a detail but maintaining consistent scale and alignment. In this chapter we move through common traps and offer a simple, step-by-step path to a confident, readable drawing. Start by constructing the truck from basic shapes: a long rectangle for the body, a smaller rectangle for the cab on the left, and two large circles for the wheels. Use a light centerline to guide a straight chassis, then check the left and right sides by eye and adjust with gentle erasing. Keep the silhouette boxy and balanced; compare the cab height to the body length to judge proportion. The ladder should sit atop the roof as a slim, separate rectangle that projects slightly outward, not as a single line. Add storage panels and hose reels as restrained details along the sides, avoiding crowding. Place the cab lights and a small siren on the roof with scale in mind so they read as important but not oversized. When you finish, outline with deliberate strokes and erase guidelines to sharpen the final shape. Color can help readability—red bodies with white or yellow trims often read as a fire truck—yet color should reinforce proportions rather than compensate for them. Remember to step back frequently and compare the left and right sides, adjusting until the drawing feels grounded and coherent. With practice, the same approach works from different angles and sizes and helps you communicate a clear, boxy rescue vehicle at a glance.
Turning a Simple Fire Truck Sketch into a Modern Rescue Machine: Creative Customizations for Easy Drawings
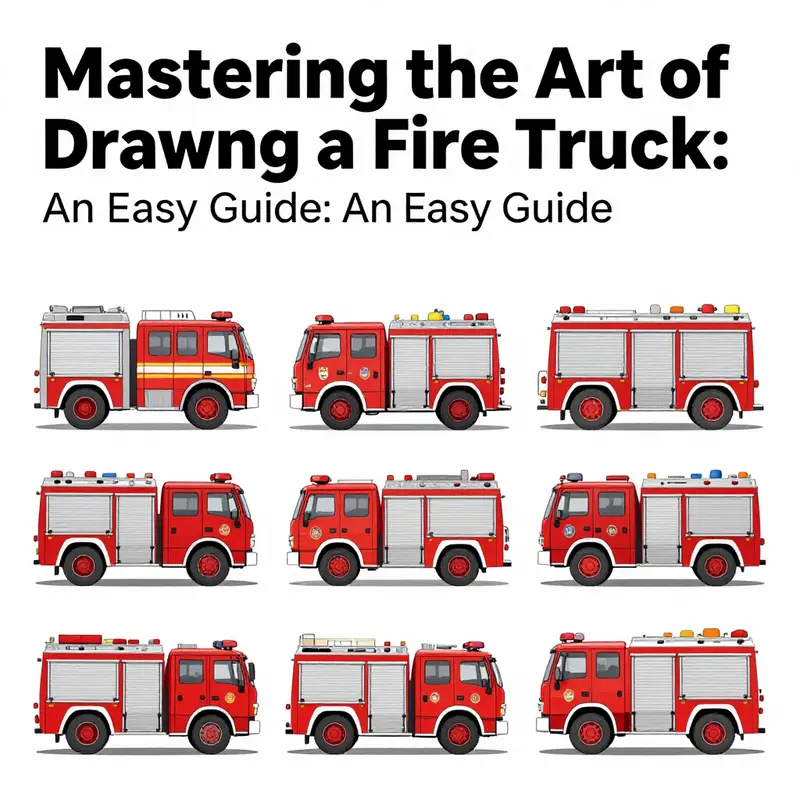
A simple fire truck drawing starts with a straightforward rectangle, a cab, and a couple of wheels. It is enough to convey the idea, and that clarity is precisely why beginners and children alike find it approachable. But a scene can breathe more life when you let your imagination loosen the lines around the basics. This chapter invites you to move beyond strict likeness and into a practice of customization that stays accessible. The core trick is to treat every added detail as a chance to tell a small story about what a modern fire engine might carry or how it could operate in a real rescue. You begin with the same essential shapes, then layer in ideas that feel both plausible and visually exciting. The first step is to respect the simple logic of the original method. Draw the main body as a bold rectangle; the cab sits on the left, a pair of wheels anchors the form, and a roof line carries the ladder. After you have this backbone, you are ready to customize without losing the recognizability that makes the sketch easy to understand. The beauty of this approach lies in its balance: a clear, easily readable shape joined to thoughtful, imaginative additions that remain simple to draw. The more you practice, the more natural these enhancements become, almost like new moves in a game you’ve played a hundred times before.
Consider, first, a futuristic dashboard. The driver’s side interior is a small theater of possibilities, yet you can capture it with a few clean lines. Draw a slim rectangle near the cab window to represent a control panel. Inside, add tiny icons: a signal bar, a battery symbol, or a solar panel emblem. The goal is not to create a photo-realistic cockpit but to evoke a sense of smart readiness—how a modern fire truck might integrate information, navigation, or energy management into daily operations. Keep the shapes compact and the details minimal. A dozen tiny marks, carefully placed, can imply a world of high-tech capability without muddling the drawing. This is where the art of suggestion shines. The commission is to show intelligence without overloading the page. A single, crisp icon can communicate more than a dozen idle lines. If you want readers to see a thread connecting your sketch to real-world design, you can point to the idea of intelligent equipment as a bridge between simple artistry and serious functionality. For instance, a small 5G-like symbol might hint at augmented reality navigation, while a battery symbol suggests electrification as a future possibility for rescue fleets. This is not about predicting exact equipment but about inviting curiosity and encouraging a viewer to imagine the scene’s practical details.
Next comes the rooftop concept, where the ladder and rescue tools live. A roof-mounted drone rack can transform the narrative from a static vehicle into a dynamic tool for modern rescue. Sketch a compact, foldable platform shaped like a Y on the roof. This is enough to imply a specialized deployable system without complicating the drawing. The idea is to sprinkle realistic technology into a child’s artwork in a way that’s visually legible and safe to render. A Y-shaped platform can be drawn with three converging lines and a small deck, suggesting a compact launch point for tiny drones or sensors. The drone rack becomes a storytelling device, hinting at the kinds of tools responders might use in real emergencies. If your scene requires motion, you can pair the rack with a quick wink of motion lines near the wheels, letting the eye read both the vehicle and its possible mission at a glance. The result is a more dynamic composition that still adheres to the “easy to draw” rule because the shapes remain straightforward and scalable.
Solar energy is another engaging avenue for customization that fits well with a child-friendly drawing while introducing a nod to real-world sustainability. Instead of a flat roof, paint a roof area with a light blue or translucent tint to imply solar cells catching light. Tiny hexagonal patterns can stand in for the photovoltaic cells, and you can even label the roof with a simple note such as “85% Transmittance” to hint at the scientific basis of the design. The hexagon motif is small enough to avoid clutter but meaningful enough to spark curiosity. This approach teaches that safety and efficiency can coexist with style. The color choices contribute as well: a solar roof not only looks contemporary but also communicates a story about energy resilience and rapid response in challenging environments. The overall effect remains accessible to a beginner, yet it carries a sense of forward-thinking practice.
Color, as much as line, guides the imagination. Use color strategically to tell a story rather than merely decorate. For the main body, you can apply a bold flame-blue to establish the vehicle’s identity, while reflectors and lights glow in bright fluorescent yellow. This combination is both legible and striking on the page. To give the ladder a sense of depth and modernity, consider a subtle blue-to-purple gradient along its length. A gentle gradient reads as a glow or a hint of energy running along the metal, which can make the ladder feel almost alive on a two-dimensional surface. The gradation should stay soft and crisp, not abrupt, so it remains within the “easy to draw” territory. If you want to push the storytelling further, you can describe how the color choices reflect safety standards and visibility expectations, which are important in actual trucks and rescue equipment. The visual impact is immediate, and it also opens a path to discuss color psychology with young artists—red for urgency, blue for trust, yellow for caution—without requiring complicated shading or complex mixing.
A layer of authenticity can be added with carefully chosen safety details that are simple to render. One of the most effective touches is a 45-degree slanted line at the pipe joints to suggest breathing apparatus tubing. It’s a small, believable cue that turns a plain diagram into an educational artifact. You can also include a tiny label on the extinguisher, such as “5L / 1.5MPa / Batch #2025,” to offer a glimpse into real-world equipment labeling. These details should be limited in number and placed with restraint so they don’t overwhelm the drawing. The aim is educational nuance rather than technical completeness. When done well, such elements invite a viewer to notice and interpret, sparking questions about how a real truck carries, connects, and uses its gear. The result is not a technical manual but a rich, telling illustration of modern rescue capabilities made approachable through simple artistry.
Ladder customization offers another chance to explore form and function. Rather than a straight, static line, you can extend the ladder into a diagonal X shape or even a spiral. This demonstrates how ladders fold, deploy, and reach difficult angles during real rescues. It also gives the drawing a sense of action—an essential quality when depicting emergency response scenes. The diagonal or spiral ladder invites you to think about timing and distance in space, teaching a subtle principle of perspective. You may find it helpful to place one end of the ladder near the cab and the other reaching toward an imagined rooftop target, creating a visual arc that guides the eye across the page. The ladder becomes not only a prop but a narrative device that communicates readiness, versatility, and the complexity of real firefighting operations in a form children can grasp.
To tie all of these ideas together, imagine a dynamic scene rather than a static, posed vehicle. Set the fire truck at a slight angle—perhaps 60 to 120 degrees—to convey speed and urgency. Add motion lines around the wheels as they spin, and consider a background suggesting a building and smoke, with a burst of stylized flame or caused by drama of a rescue. Use bold red for the main body, but keep the palette controlled and readable. The goal remains clarity with a spark of energy, not a chaotic splash of color. In this balance, you teach the viewer that a simple drawing can carry a vivid story. A scene like this not only entertains but invites discussion about how engines operate and how firefighters navigate complex urban environments. The art becomes a gateway to curiosity about safety, teamwork, and innovation in public service.
As you weave these ideas into your easy-fire-truck template, you also connect to a broader conversation about how design informs practice in real-world contexts. The concept of customization is transformative: it respects the core recognizability of a fire truck while inviting personalization that reflects local needs, aesthetics, and imagination. In regions with different terrain or budgets, designers imagine adaptable features that still convey essential function. The beauty of this approach lies in its inclusivity. A child in one country can customize a truck with features relevant to their neighborhood, while a learner elsewhere can experiment with the same shapes to explore new possibilities. If you want to explore how these design considerations translate into real-world vehicles and regional adaptations, you can read about customized firefighting vehicles for developing countries meeting diverse terrain and budget constraints. This link offers broader context on how creative drawing intersects with practical, regionally informed design.
The practice of customization is not merely decorative. It becomes a tool for learning—about spatial reasoning, sequencing, and the relationship between form and function. When a child adds a solar roof, a drone platform, or a gradient ladder, they are rehearsing a design language that engineers use to convey capability without overwhelming the observer. The process teaches careful observation: how light interacts with surfaces, how colors signal different functions, and how even a simple line can imply motion, energy, or safety. It also reinforces conceptual thinking about safety standards. The combination of a bright body color and high-visibility stripes, along with the softened glow of a backlit ladder, provides a unified visual cue that makes the scene legible from a distance. The drawing thus becomes a practical exercise in communication, an essential skill for any young designer who hopes to convey complex ideas with minimal words.
To maintain the accessibility promised by an easy drawing, each customization is introduced with clear, small choices. If you’re teaching this to a classroom or a family, model the process as a sequence: start with the basic shape, add one feature at a time, and then revisit the color story. Encourage your learners to narrate what each addition means for the vehicle’s function or how it enhances safety. For instance, the drone rack is not just a gadget; it signals an enhanced capability to survey a site from above. The solar roof is not a mere sunny ornament; it hints at energy efficiency and resilience. The 45-degree tubing line is not a random scribble; it represents real equipment and their connections. By pairing each detail with a brief explanation, you turn a simple picture into a learning moment without turning the drawing into a technical diagram. The goal remains joy, exploration, and a sense of achievement that comes with adding a new piece to a familiar puzzle.
In the end, the chapter that begins with a child’s first rectangle becomes a pathway to a richer, more expressive practice. The easy-fire-truck drawing is not a fixed endpoint but a flexible platform for imagination and education. It invites you to ask questions about how rescue teams might equip their vehicles, what new tools could assist them, and how color and shape help a viewer understand the scene at a glance. The act of customizing is an invitation to engage with design as a form of storytelling—one that honors the fundamentals of the original method while expanding its horizon with thoughtful, achievable innovations. For readers ready to explore further, the journey from simple schematic to a vivid, customized rescue machine is a small step that opens a world of creative, educational, and expressive possibilities. External resource: https://www.youtube.com/watch?v=9Q7jV0XkLbI
Final thoughts
Drawing a fire truck is not only a fun creative exercise but also a great opportunity to celebrate the bravery of firefighters and the essential service they provide. From the steps you learned to avoid common mistakes and embrace your unique artistic flair, this guide empowers you to create a vibrant representation of a fire truck of your dreams. Let your imagination soar as you not only replicate a fire truck’s design but customize and personalize it to tell your artistic story. Keep practicing, and soon you’ll have a portfolio of fire trucks that showcase your unique artistic style and passion for firefighting!