
Whether you’re a passionate collector, an aspiring young firefighter, or a professional in emergency services, making a fire truck model can enhance your appreciation for these remarkable vehicles. Crafting these models not only instills a sense of pride but also serves as a fun educational activity that bridges creativity with understanding of fire safety. In this guide, we’ll explore various ways to create your own fire truck model, from simple crafts using everyday materials to more advanced builds inspired by real-life fire truck engineering. Each chapter is designed to empower you to unleash your creativity while engaging with the world of firefighting and emergency services.
Everyday Treasures, a Roaring Rescue: Crafting a Simple Fire Truck Model from Household Materials
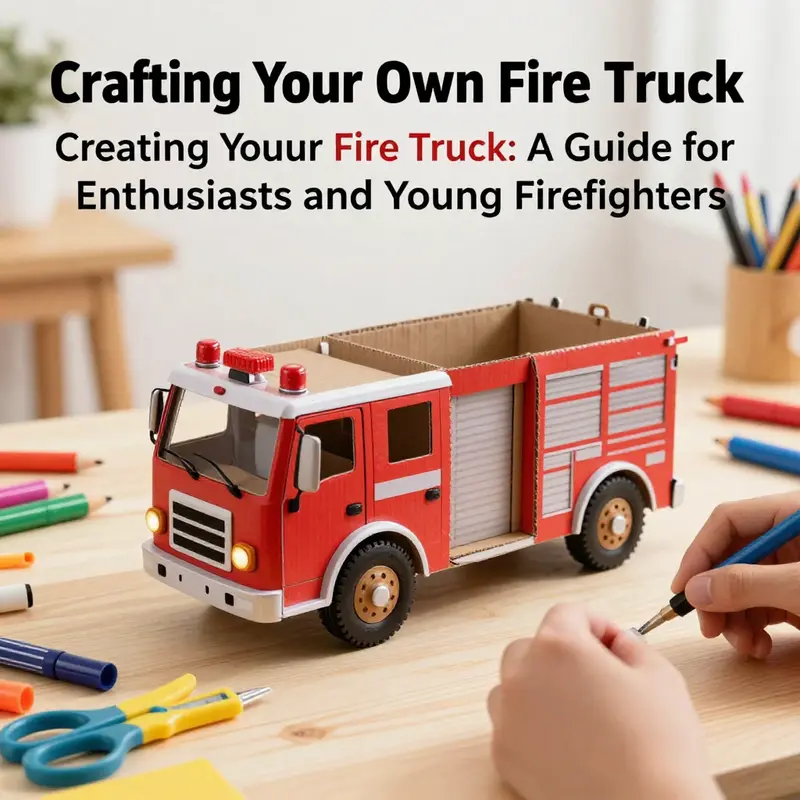
A fire truck is more than a symbol of emergency response; it is a portable lesson in design, balance, and teamwork. When you bring a few everyday objects together and shape them with care, you create not just a toy or a display piece, but a tactile invitation to explore how form follows function. This chapter invites readers to build a simple fire truck model using items commonly found at home. The process is deliberately accessible, crafted to spark imagination while quietly teaching fine motor skills, spatial reasoning, and a basic grasp of vehicle design. It is a chance to see how a small idea can become a scaled, working representation of a real rescue vehicle, and it foregrounds the idea that thoughtful crafting can turn ordinary materials into something that feels special and instructive.
To begin, gather a few straightforward supplies that are widely available and inexpensive. The main body of the truck can be fashioned from a clean, empty milk carton or a similar-sized cardboard box. This choice is not only practical but also instructive: it invites you to think about the proportions of a vehicle, how length and height influence stability, and how the weight distribution affects how it sits on wheels. Scissors will handle the cutting, while glue or tape will bind the pieces. For a dash of color and personality, colored paper or markers will serve as the paint and decals, transforming a plain carton into something that reads as a fire vehicle from a distance. Small bottle caps or plastic lids can be repurposed into wheels, giving the model mobility and a tangible sense of scale. If you want to add a touch of realism, you can fashion a ladder from a straw—cut into several equal sections and assembled along the side of the truck. And to suggest a hose, roll a strip of paper into a tube and secure it with tape, attaching it to the rear or side as a flexible, extendable element.
This craft balances simplicity with a clear sense of purpose. The idea is not to reproduce a precise model, but to capture the recognizable silhouette and features of a fire engine: a sturdy body, a high, prominent cab, a long ladder, and a hose ready for action. The activity is especially valuable for younger makers, who practice hand–eye coordination and begin to understand how different parts fit together. Yet it remains engaging for older hobbyists who want a quick, satisfying project that respects recycling and creativity. As with any hands-on activity involving tools, it carries a safety note: when children are involved, adult supervision is essential, especially around scissors and any sharp edges. Keeping tools age-appropriate and using child-safe scissors ensures the experience remains joyful and secure. With that caveat in mind, let’s walk through a fluid, step-by-step approach that preserves the storytelling aspect of building a rescue vehicle while keeping the process approachable and enjoyable.
The first major decision concerns the main body. Take the milk carton or the chosen cardboard box and carefully cut it in half lengthwise to create two flat portions. This simple division yields a front section and a rear or roof section that can be repurposed into the basic shape of the truck. The cut should be deliberate and gentle, leaving clean edges that will be easier to smooth and decorate. If your carton has a top lid, you can tuck it away for later use as a separate feature, or discard it to simplify the body. The goal is to establish a stable, elongated form that can rest evenly on a set of four wheels. Once the two halves are prepared, you can begin to think about the truck’s color language. Fire engines are often striking in their color—and the most iconic choice is red with yellow or white accents. A coat of red paint or red paper wrapping immediately signals the vehicle’s purpose. If you prefer to rely on paper, wrap the carton in red construction paper or bright red wrapping paper, then add yellow windows, stripes, and the word FIRE with either marker letters or cut-out shapes. The lettering doesn’t need to be perfect to be effective; the charm comes from the hands-on effort and the sense of accomplishment after you see the word clearly displayed.
Next, assemble the wheels. Four bottle caps or plastic lids form a simple, sturdy wheel system. Puncture holes or simply affix the wheels to the bottom of the carton’s flat sections with glue or strong tape. The alignment matters for balance: try to position the wheels evenly so the model stands upright without wobbling. If the base feels unsteady, you can widen the wheelbase by gluing a small strip of cardboard along the bottom to extend the footprint. This tiny adjustment makes the model more stable and gives it a more credible stance, a subtle reminder of how real fire engines sit solidly on their wheels to support heavy equipment and crew.
To introduce the ladder, repurpose a straw into multiple ladder rungs. Slice the straw into several equal lengths and arrange them vertically along the truck’s side, connecting each rung with thin strips of tape or glue to simulate a lightweight, extendable ladder. The ladder’s placement can be along the side opposite the wheels, where it would be accessible for firefighters in real life. This feature adds vertical storytelling to the model, signaling the fire truck’s capability beyond mere transportation. You can also use a second strip of paper to form a small, decorative ladder on the cab’s roof if you want to imply a rooftop element, though keep it lightweight to avoid tipping the model forward.
The hose is another key detail that adds realism without complicating the build. Roll a piece of paper into a tube and secure it with tape to form a flexible hose. Attach the hose to the back or side of the truck, curling it slightly to suggest readiness to spray water. If you want a brighter touch, color the hose with a marker before rolling or add a second color to imply different segments of the hose line. The hose is not only a visual cue; it also invites a playful sense of improvisation—the idea that the vehicle is not just a display piece but a tool for imagination and rescue scenarios.
Decoration is where the model begins to truly come alive. Use colored paper to cover the body, then decorate with windows, doors, and the all-important FIRE lettering. Small details register in the viewer’s mind as clues to the vehicle’s function, so even simple shapes can be effective. For example, you can cut out square or rectangular windows from white or light blue paper and glue them onto the red body. A yellow stripe along the sides or a pair of dash lines on the cab can reference reflective markings and rescue equipment visibility. If you want to simulate emergency lights, tiny foil pieces or beads can be used to suggest flashing beacons on the roof or at the front corners of the truck. These small touches dramatically enhance the overall appearance without requiring specialized materials.
Throughout the build, you may find yourself making micro-adjustments to ensure everything aligns. The ladder should be securely attached but not so rigid that it makes the model top-heavy. The hose should be flexible enough to bend and point in different directions during pretend rescues. The wheels must spin freely, yet grip the surface to prevent slipping. These adjustments mirror the iterative nature of real engineering: you test, observe, and refine. A model like this becomes a small, tactile laboratory for exploring cause and effect, balance, and proportion.
In completing the project, the sense of accomplishment comes not only from finishing the model but from the chance to tell a story with it. A child can place the fire truck on a pretend street scene, call out a neighbor’s name as the “victim” or the “firefighter,” and narrate a simple rescue. The activity thus becomes storytelling equipment as much as it is a craft project. It invites discussion about how emergency services operate, what roles the different parts of the vehicle play, and how teamwork makes such missions possible. It is a gentle, hands-on gateway to learning about public safety without requiring a complex kit or advanced tools.
As an educational note, this approach also promotes sustainable crafting. By repurposing an everyday carton and recycling bottle caps and straws, you teach the value of reusing materials and reducing waste. The simple act of transforming items that might otherwise be discarded into something functional and fun reinforces an eco-conscious mindset. It also makes the process more accessible to families, classrooms, and community centers, where budgets can be tight but curiosity is high.
If you’re seeking additional inspiration or similar projects, there are resources and templates available online that guide learners through a variety of model-building activities. These templates can be especially helpful for those who want to scale up the project or adapt it for different age groups. For instance, you might find printable layouts that simplify cutting and assembly, or they may offer different color schemes and designs so that each model has a unique personality while retaining recognizable firefighting cues. The beauty of this family-friendly craft lies in its flexibility: you can adapt the complexity to match the maker’s abilities and interests, adding more components or simplifying as needed. The core experience remains the same—engaging, educational, and uplifting—while demonstrating that the process of making can be as important as the finished object.
A practical note for educators and caregivers: if you intend to involve children in this activity, plan ahead for safety and proper supervision. Keep scissors designed for children within easy reach, and demonstrate how to handle them safely. If using glue, remind makers to apply it with care on the intended spots and to avoid touching the adhesive before it sets. If you do decide to work with sharper tools or more advanced materials, ensure the environment is controlled and that adult oversight remains constant. This approach preserves the spirit of the craft while maintaining a strong emphasis on safety and responsibility. The goal is a joyful, memorable learning moment, not a rushed or hazardous experience.
Beyond the immediate pleasure of making, this simple fire truck model can function as a stepping stone to deeper explorations of mechanical systems. For instance, learners can explore how scales affect design by measuring the length and width of the main body and comparing them to the wheelbase. They can investigate how weight distribution changes when the ladder is added or when the hose is extended. The activity invites questions: How would changing the wheels’ size affect stability? What if the ladder needed to deploy or retract—how could that be simulated with basic construction? These lines of inquiry foster curiosity and critical thinking in a low-stakes setting, encouraging an experimental mindset that is valuable across disciplines, from science to art.
In the broader arc of how to make a fire truck, this model serves as a foundational approach that respects accessibility while acknowledging the delight of hands-on creation. It is a reminder that the essence of building something meaningful often lies in starting with simple, ubiquitous materials and framing the project around a narrative—one that places the maker in the heart of a rescue scenario, guiding the action with imagination and care. The finished model is not merely an object to display; it becomes a memory of collaboration, problem-solving, and the satisfying rhythm of turning ordinary items into something that captures a spark of heroism and a sense of community service. If the reader desires more complex or larger scale projects later, this simple model can serve as a proven starting point from which to branch out toward more ambitious builds, with improved materials and more elaborate features.
For readers seeking further avenues of exploration that echo the same spirit, consider following related content on our site. You can discover additional crafts and fire-truck-themed projects that align with different skill levels and interests through the linked resources. This path offers a continuum of ideas, from quick, beginner-friendly tasks to more intricate builds that challenge growing makers while preserving the playful, learning-centered atmosphere that makes these projects engaging and meaningful. And when you’re ready to broaden your exploration beyond crafts, there is a wealth of practical information about how fire apparatus are designed and deployed in real-world contexts, which can enrich the storytelling and deepen the appreciation of public service. To stay connected with related discussions, you might follow updates on nearby posts about rescue readiness, vehicle components, and the ongoing evolution of firefighting technology.
In closing, the simple fire truck model you’ve crafted embodies more than a craft project. It is a compact workshop where design, safety, artistry, and storytelling intersect. It demonstrates that gorgeous, functional learning can come from the most unassuming materials. It also reinforces a constructive message: with a few common supplies and a willingness to experiment, anyone can participate in the joy of making. Whether used as a classroom demonstration, a home crafting session, or a quiet afternoon project, this model invites a shared experience of making, imagining, and rescuing—an approachable step toward understanding how real fire trucks operate and how communities come together to respond when help is needed.
From Sticks to Sirens: Crafting a Hands-On Fire Truck Model with Sticks and Paper
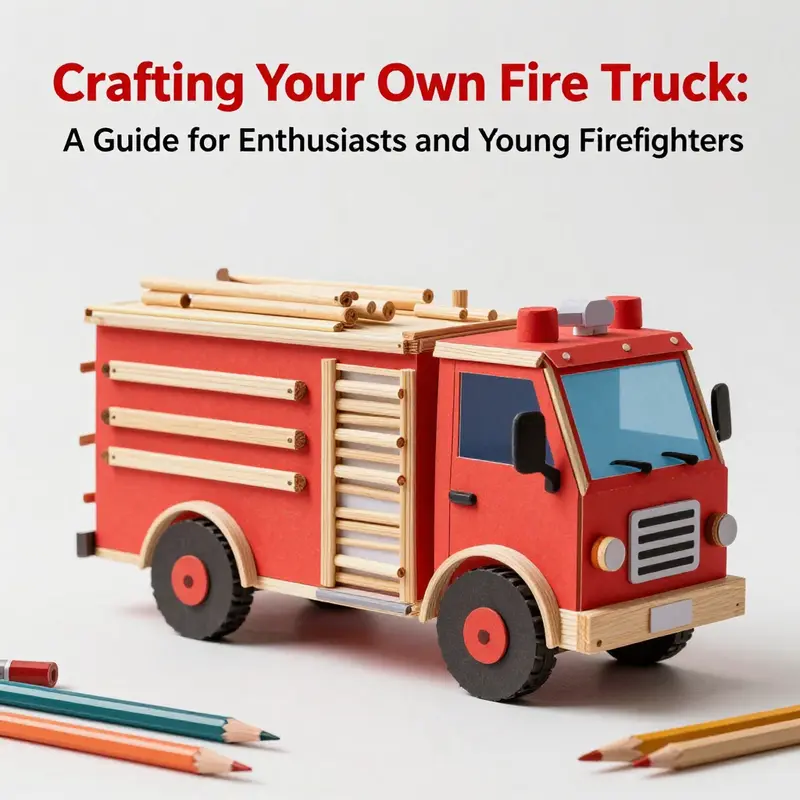
A fire truck is a symbol of readiness and response, a functional silhouette that speaks to teamwork, engineering, and quick, organized action. When you translate that symbol into a hands-on model made from sticks and paper, you’re not just making a toy. You’re guiding a small, tactile exploration of structure, proportion, and purpose. This approach keeps the process accessible for younger builders while offering more deliberate, design-focused challenges for older makers. The idea centers on letting natural materials carry the backbone of the model while paper elements bring the color, detail, and imagination that turn simple sticks into a convincing vehicle. It’s a project that invites experimentation, problem solving, and a sense of accomplishment that comes from seeing a plan take shape with your own hands.
Begin with a mindset that values simplicity and flexibility. The most satisfying builds often emerge when you start with a light sketch in your mind and then let the materials respond. You’ll find that the sticks form a rigid spine, the paper sections provide scale and contrast, and well-chosen attachments create the illusion of moving parts without requiring complex joinery. The core is a sturdy chassis made from a small cluster of straight sticks laid end-to-end. The chassis serves as the framework that holds everything else in place, much like a real vehicle’s frame. To keep the assembly approachable, you can work on a flat, uncluttered workspace and use a minimal toolkit—glue, paper, scissors, a ruler, and a pencil. Ground rules like “measure twice, cut once” still apply, but you’ll discover that the most important skill is alignment: ensuring angles, edges, and lengths feel balanced to the eye.
Gathering materials is part of the design conversation. Look for straight, slender sticks that resemble the light scaffolding you’d see on a real fire truck’s back end or ladder supports. If you don’t have natural branches handy, craft sticks or dowels cut to size work just as well. Paper serves as the vehicle’s skin and details. Colorful construction paper or cardboard works for the body, while brighter shades can highlight the cab, the hose bed, or the ladder. For features that catch the eye, use smaller scraps of paper to create windows, lights, and emergency markings. A sheet of thin cardboard can be cut into wheels with clean circular shapes, or you can repurpose bottle caps or rolled paper disks for a more rounded look. Where speed matters, glue is your friend, but the project benefits from patience. Let each joint dry before adding the next layer to avoid wobbly sections that misalign the chassis.
The build begins with the base. Lay out two parallel sticks as the chassis rails and add a third cross piece to anchor the front and the rear. This gives you a stable, rectangular platform to mount the rest of the components. The next move is to craft the wheel assemblies. Create four circular wheels from cardboard, cut close to a true circle, and punch a small hole in the center for a simple axle that can be threaded with a short stick or a toothpick. If you want more realism, carve a shallow groove around the wheel’s circumference to imply tire treads. Attach each wheel with a dab of glue on the axle and a touch of glue at the contact point on the chassis. The result is a model that can stand on a surface and nod its head with the faintest push—a small, satisfying propulsive sense of life in a static object.
With wheels in place, you can start shaping the truck’s body. Think of the body as a two-part narrative: the lower portion forms the base, and the upper portion gives the signature silhouette and color. A large stick or folded paper panel can serve as the body’s side, spanning from the front to the rear and providing a convenient surface to attach the cabin. The cabin itself is a compact block cut from cardboard or thick paper. It should sit comfortably on the chassis, leaving room for a small front window cutout. The window can be created by folding a piece of clear or light-colored paper into a shallow rectangle and then gluing it onto the front face. The front of the truck can be simplified into a small block with a triangular top to hint at the windscreen, or you can keep it rectangular for a more stylized, graphic look.
The ladder and hose bed are where the build becomes particularly expressive. Paper is superb for ladders; you can cut two long strips for rails and add evenly spaced rungs with small slivers of thin wood, cardboard, or even tightly rolled paper strips. If you want to simulate a closed ladder rather than a straight stick ladder, you can create a single folded paper ladder with a zigzag profile that folds against the body. The ladder can be mounted along the side, leaning against the body in a way that suggests readiness to extend. The hose bed—often a flat area at the rear or side of a fire truck—can be suggested with a shallow shelf made from a broadened strip of cardboard or thick paper. Small, folded paper circles or ovals can stand in for water nozzles and valves, providing subtle relief and interest at the back of the model.
Color and detail bring the model to life. If you’re using paper, you can wrap or layer colors to simulate the bright red body and white or yellow accents commonly seen on fire apparatus. Fine-tune the look by adding small patches of paper for doors, panels, and reflective stripes. Very small details—like a tiny circle for a siren or a pinpoint rectangle for a headlight—acknowledge the real-world features without making the model overly fussy. The eyes of the build are balance and proportion: you don’t want a giant ladder tilting the structure, yet you want enough detail to read the vehicle’s purpose at a glance. When in doubt, step back and reassess the silhouette. The eye is drawn to a well-proportioned form that reads clearly from a short distance, which is the essence of a satisfying, display-ready model.
The project also becomes a practical exercise in scale and geometry. Builders can estimate a simple one-to-two scale, where every inch on the model represents roughly two inches on the imagined real truck. This helps with decisions about how much paper is needed for the body and how long the ladder should be in relation to the chassis. You do not need to measure down to the millimeter; what matters is the sense of proportion. Seeing the model evolve from a handful of sticks to a recognizable fire truck is equally a lesson in visual literacy and spatial reasoning. The process invites you to discuss why ladders extend, why the hose bed sits where it does, and how the cabin relates to the overall reach of the vehicle. Those conversations can become a subtle, informal introduction to basic engineering thinking—how a simple shape becomes a working tool when its parts are correctly scaled and connected.
A note on safety threads through the entire process. When children are involved, supervision is essential whenever sharp tools or cutting activities are part of the project. Scissors, a craft knife, or any blade should be treated with care, and the working surface should be stable and protected. If a younger builder wants to participate without direct contact with sharp tools, provide pre-cut paper pieces, ready-to-assemble panels, and larger, safer components that can be glued in place. This approach preserves the collaborative spirit of the project while maintaining a strong safety margin. The goal is to foster curiosity and dexterity without inviting risk, so keep tools out of reach when not in use and set clear boundaries about which steps require adult assistance. The focus remains on learning through making, and safety is the quiet foundation that lets that learning unfold confidently.
As you refine the model, you’ll likely discover that a little improvisation yields the best results. Paper can be crumpled slightly to create subtle curves on the body, suggesting a more three-dimensional form. Sticks can be trimmed asymmetrically to capture a sense of weathered texture or to create a more playful, handmade look. The beauty of this method lies in its flexibility: you can press forward with minimal material and still achieve a convincing, vivid result. If one piece doesn’t fit perfectly, reimagine it as a design feature rather than as a failure—perhaps the misfit becomes a small storage box or a decorative panel that adds character rather than reducing realism. The craft becomes a dialogue with the materials, and every adjustment reinforces an important lesson about adaptation, a core principle of engineering thinking.
This kind of project is especially valuable in an educational setting precisely because it is scalable in difficulty. For a beginner, the emphasis is on the joy of assembly, basic shapes, and color. For an experienced maker, you can introduce more precise proportions, multiple layers of paper for depth, or even a small mechanism to simulate a fold-out ladder using simple hinges drawn with careful cuts and careful gluing. It’s possible to extend the activity into a small display model that sits on a desk, in a classroom window, or on a shelf in the home, serving as a constant reminder of the power of hands-on learning. In this way, the sticks-and-paper fire truck becomes more than a solitary craft; it becomes a bridge to broader explorations of vehicle design, hazard awareness, and the teamwork that makes rescue possible.
If the chapter’s aim is to blend craft with a touch of pedagogy, you can weave in additional questions and prompts as you work. How does the ladder’s length affect the truck’s balance? Why does the hose bed need to be positioned toward the rear of the vehicle? What materials help a model feel sturdier, and where might you flex the design to emphasize function over form? The answers can emerge through experimentation, measurement, and thoughtful observation rather than through a rigid, prewritten script. The process will encourage builders to articulate their decisions, justify their material choices, and appreciate the interplay between form and function that real-world vehicles embody. This reflective practice can link the craft directly to a broader curriculum on engineering thinking, problem solving, and design literacy.
In weaving together sticks and paper, you also cultivate an appreciation for resourcefulness. The project invites you to reimagine everyday scraps—the sort of recyclable leftovers that often go unnoticed—as valuable design elements. A thin strip of cardboard becomes a bumper; a small disk of colored paper becomes a light. This mindset is more than artistry; it mirrors a fundamental approach in the world of infrastructure and emergency services: simple, modular solutions that can be adapted to varying contexts. The same logic that underpins a versatile curbside craft also informs how fleets are designed to be robust, repairable, and adaptable to different environments. The model’s playful, tangible nature fosters a kinesthetic understanding of how a real vehicle is built, maintained, and deployed when communities call for help.
To broaden the experience beyond the tactile, you can introduce a narrative frame for your build. Create a little scenario: a station house nearby, a plan for a rescue mission, or a target environment such as a city street or a rural road. The chassis, the cab, the ladder, and the hose bed become characters in a story as much as they are technical components. The storytelling dimension invites more deliberate choices about color schemes, markings, and even the arrangement of details that signal the truck’s function to a viewer who may not read the model’s every axis. In this way, the craft becomes a cross-disciplinary encounter, melding art, engineering, and narrative into a single, rewarding activity.
When you step back to admire the finished model, you may notice a small footprint of your own problem-solving journey. The curves you coaxed from flat paper, the joints you coaxed to hold with simple glue, and the balance you achieved between weight and structure—all of these aspects echo the careful considerations that professionals bring to real equipment. The beauty of this project is not only in the end product but in the process itself: a patient, iterative exploration that yields a tangible artifact and a deeper understanding of how a fire truck is designed to meet the demands of rapid response, crew safety, and effective firefighting. If you want to explore more craft-driven ideas and techniques as you continue this journey, the Fire Truck blog offers related discussions on modeling and DIY approaches. Fire Truck blog
For readers who crave visual guidance to complement the tactile experience, a comprehensive DIY tutorial on paper-model construction is available via external reference. The linked guide demonstrates a range of paper-model techniques that can be adapted to your own sticks-and-paper fire truck. It provides clear steps, diagrams, and photo sequences that can help you translate the narrative described here into a precise, replicable build. Use the reference to inform your approach, then tailor the technique to your preferred scale, materials, and level of detail. The goal remains consistent: a model that captures the spirit of a fire truck while reflecting your own hands-on ingenuity and design sensibility.
In the end, this sticks-and-paper approach to making a fire truck is less about a perfect replica and more about a mindful, creative process. It invites you to study form, to manipulate materials with intention, and to experience how simple components can come together to suggest a working tool. It’s a project that honors the craft of making, the appeal of mechanical reasoning, and the satisfaction of turning a few ordinary items into something that feels purposeful and alive. When you place the finished model on display, you’ll notice not just a colorful, sturdy miniature, but a small archive of decisions, trial runs, and moments of improvisation that together tell the story of a builder who learned by doing.
External resource: For a detailed visual reference and broader exploration of paper-model techniques, see a DIY paper model guide on a popular social platform: https://www.pinterest.com/pin/123456789012345678/
Engineering Realism: Crafting an Advanced DIY Fire Truck Model Grounded in Real Design Principles
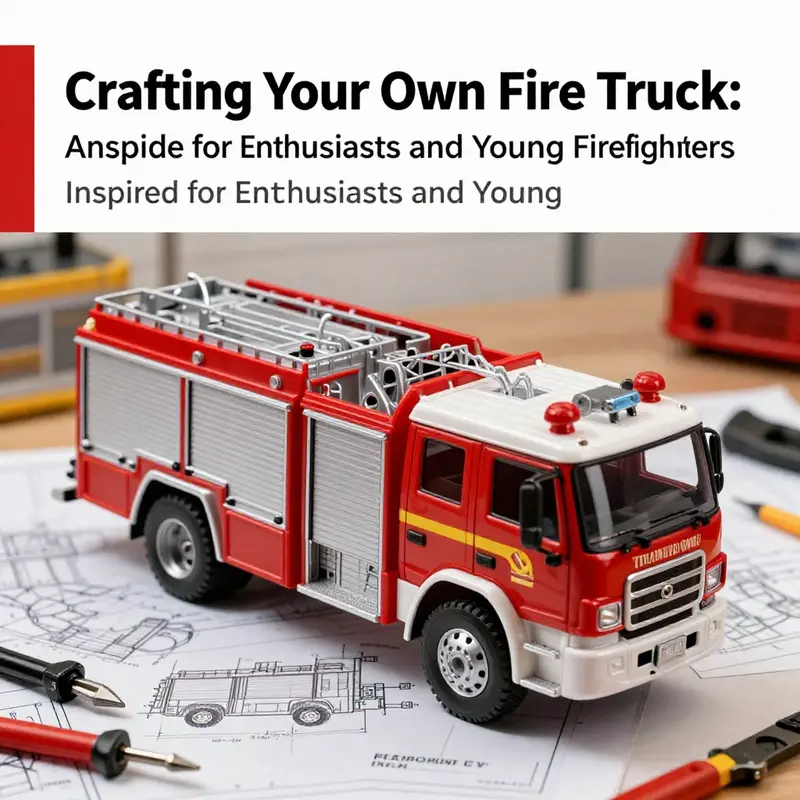
Creating an advanced DIY fire truck model that reflects real-world design principles moves beyond simple, decorative builds. It invites thoughtful decisions about how a vehicle actually works, how crews interact with it, and how each component contributes to fast, safe, effective firefighting. The process hinges on translating functional layout into a scale model that remains durable, playable, and educational. When approached with respect for real design principles, this project becomes a bridge between craft and engineering, a way to honor the complexity of emergency vehicles while remaining accessible to dedicated hobbyists and curious learners alike. The heart of this endeavor lies in recognizing that a fire truck is not a single object but an integrated system. It combines a weighted chassis, a hydraulically active water supply, organized storage for hoses and tools, and a cab that keeps the crew safe and focused under pressure. The challenge—and the reward—comes from weaving these elements into a cohesive whole that feels both authentic and functional at a smaller scale. At the core of the model, a centralized pump panel sits as the brain of the water system. In a real apparatus, the pump panel is usually positioned toward the rear or the side of the vehicle, where it can be accessed quickly by crew members needing to connect or monitor water flow. For the model, this translates into a carefully placed, realistically scaled panel with a few clearly labeled valves and control levers. The goal is not to replicate every technical nuance of an actual pump, but to convey the essential relationships: a water intake, a pressure regulator, a discharge line, and an outlet hose line that can be connected to a mock hydrant or reservoir. The panel acts as the focal point for the model’s hydraulic narrative, guiding the observer through the logic of how a truck makes water available for firefighting. The placement of these controls matters as much as their appearance. Much like a real truck, the panel on the model should be reachable by a person standing in the imagined driver’s seat or by a firefighter climbing onto the side step. The ergonomics of access—how smoothly a user can reach the valves, flip a lever, or read a gauge—become part of the learning experience. When considering the pump panel, it is useful to think about the sequence of actions a crew would perform under pressure. First, the pump is engaged to establish the water supply. Then, hoses are deployed and connected to the intake and discharge points. On the model, you can simulate this sequence with a simple, manual mechanism: a pull from a tether that starts a pretend pump, followed by a series of colored hoses that can be detached and reattached. This approach preserves the model’s tactile appeal while keeping the mechanism straightforward to implement. Adjacent to the pump panel sits the apparatus compartment, a cabinet-like space designed to hold hoses, nozzles, tools, and protective equipment. In a real truck, organization is paramount: hoses coil neatly, tools have defined places, and quick access can be the difference between a delayed response and a rapid, coordinated action. Translating that discipline into a model means planning the compartment with scale-accurate racks, trays, and slots. It also invites a deeper appreciation for how compartment design influences workflow. To mirror this in a model, craft a modular internal layout with removable drawers or bins so that hoses can be stored and retrieved, and tools can be swapped in and out without disassembling the entire body. The richer the compartment’s detail, the more realistic the model becomes. Design decisions can emphasize simplicity or complexity, depending on the builder’s level of skill and available materials. The goal is to convey the logic of order, accessibility, and modularity that characterizes professional apparatus bays. A deployable aerial ladder or platform is the third pillar of realism. In actual fire trucks, an extendable ladder is a critical capability, enabling firefighters to reach upper floors or access elevated windows. On a model, the ladder becomes a dynamic feature that can move, rotate, extend, or retract. The simplest faithful representation might be a telescoping ladder mounted on a hinge so it can pivot, extend, and retract with manual controls. For builders seeking a higher degree of interactivity, the ladder can be designed with a small rotation mechanism at its base or with a sliding track that allows the ladder to extend in a controlled manner. The key is to balance realism with feasibility. Even a modest extension mechanism communicates the concept of a deployable ladder and invites interactive play without introducing fragile or overly complex systems. If a model includes a ladder, it can be accompanied by a safety-conscious feature: a locking mechanism that prevents accidental retraction or overextension. This detail mirrors how real equipment is safeguarded against unintended movement, reinforcing a lesson in reliability and careful operation. The cab design is the human-facing side of the model. It embodies the comfort and safety considerations that shape real drivers’ and firefighters’ daily experiences. In a faithful model, the cab should provide a convincing driver’s seat, clearly marked instrumentation, and an ergonomic arrangement of controls that mirrors the spatial relationships observed in actual fire trucks. Even at a reduced scale, the driver’s visibility, the alignment of mirrors, and the height of the dashboard influence how observers interpret the vehicle’s role. Achieving ergonomic realism in a model means crafting the cockpit with proportional seats and legroom, placing a set of scaled gauges, and ensuring that the controls are within reach. The spatial relationships—where the pump panel sits relative to the driver, where the hoses exit the apparatus bay, and how the ladder integrates with the body—create a believable workflow. That workflow, in turn, supports an authentic storytelling experience: a user can imagine guiding water through the pump, retrieving a nozzle from the apparatus bay, stepping onto the side of the vehicle, and deploying the ladder to reach a second-story window. Material choices underpin the entire build. Durable materials such as wood, plastic, and metal offer different advantages. Wood provides a warm, solid core for the chassis, frame, and structural elements; plastic can stand in for the molded cab and exterior panels while remaining lightweight; metal can add weight and solidity to critical components like the pump panel frame or the ladder track. The blend of materials matters for stability and durability, especially if the model is intended to be manipulated, displayed, and occasionally handled by enthusiastic young builders. The inclusion of moving parts elevates the project from a static display to a miniature, interactive system. A rotating ladder, a retractable hose reel, and a swiveling pump panel are not just decorative features; they embody the vehicle’s functional aspirations. Each moving part invites the builder to consider mechanical design decisions such as pivot points, friction, balance, and the range of motion. A practical approach is to use simple, robust mechanisms: brass or nylon bushings for pivots, low-friction plastics for sliding components, and rubber bands or light springs to simulate tension and return action. Even without complex hydraulics, small gear trains or pulley systems can emulate the feel of real movement while remaining reliable and easy to assemble. In constructing an advanced model, it helps to ground the design in established standards and professional practices. The National Fire Protection Association (NFPA) provides comprehensive standards for fire apparatus design and safety. These guidelines cover essential aspects of vehicle dimensions, structural integrity, pump and ladder specifications, and the integration of critical systems. While a hobbyist model need not meet every NFPA requirement, consulting these standards can sharpen the builder’s eye for proportion, balance, and safety. The idea is to translate principles, not to replicate every specification slavishly. Acknowledging weight distribution is part of that discipline. In real trucks, weight distribution affects braking, stability, and handling, especially when fully loaded with water and equipment. For a model, this translates into placing heavier elements toward the chassis’s lower rear and ensuring fun, safe handling when the ladder is extended or hoses are deployed. When planning the weight balance, consider the order in which components are mounted and how movable parts shift the center of gravity. This awareness helps prevent tipping or warping as the model evolves. The design conversation does not end with the elements above. A model built to reflect professional practice benefits from examining blueprints or 3D representations of the actual apparatus. Although the exact configurations vary, typical features such as modular compartments, standardized mounting points, and predictable assembly sequences recur across credible designs. Builders who study these materials can incorporate a modular philosophy: each major system—hydraulic, hose storage, lighting imitation, and ladder assembly—has a defined interface with the rest of the vehicle. That modular approach yields a model that is not only more accurate but also easier to assemble, test, and modify. If the builder seeks further inspiration on steel-centric construction or heavier, more durable fabrication, a resource such as steel fire apparatus documentation or case studies can offer practical perspectives on how to approach framing, joints, and load-bearing elements. For deeper exploration of steel construction and related concepts, see steel fire apparatus. This kind of resource helps connect the craft to broader engineering considerations without overwhelming the project with extraneous details. Throughout the build, safety and supervision remain essential, especially when children participate in any phase that involves sharp tools, small hardware, or heavy components. The core rule is to keep the activity age-appropriate and to supervise tool use, cutting, and riveting with care. The project’s educational value comes not only from the finished model but from the thinking and problem-solving it encourages. As you plan the layout, imagine the operational sequence a real crew would follow: confirm the water source, engage the pump, verify pressure, deploy hoses, and position the ladder for access. Each element of the model should map onto that sequence with clear, observable cues. For example, a colored hose reel can illustrate water flow and hose deployment, while a pivoting ladder shows the ladder’s reach and angle. The more a builder can reveal these operational cues in a safe, scaled form, the more powerful the learning experience becomes. The builder need not replicate every mechanical nuance of a fully equipped emergency vehicle. Instead, the aim is to communicate the essence of emergency response engineering—the careful balance of accessibility, reliability, and agility. A well-crafted model demonstrates how design choices affect usability and performance in real-world scenarios. It invites viewers to consider questions such as how equipment is stored for rapid access, how a crew maintains situational awareness with limited space, and how a vehicle remains controllable while extended equipment changes the vehicle’s dynamics. Incorporating these ideas into your project creates a narrative that connects craft with engineering judgment. The result is a model that is both visually convincing and functionally expressive, capable of withstanding hands-on exploration and thoughtful observation. The practical path to achieving this involves disciplined planning and iterative refinement. Start with a clear scale and a draft layout that places the cab, pump panel, apparatus bay, and ladder in deliberate proximity. Move on to fabricating a chassis from a sturdy material, then build up the body panels, leaving access panels and mounting points for the compartments. Install a simple pump-simulating mechanism, a modular apparatus bay, and a basic ladder track. Test the interactions: can you pull a hose out of the bay smoothly? Does the ladder extend without binding? Does the panel align with the imagined driver’s line of sight? Each test offers insights that guide adjustments to materials, tolerances, and assembly order. A final polish includes finishing techniques that evoke the real vehicle’s appearance: paint with a durable clear coat, weathering to suggest use, and careful detailing of reflective striping, signage, and lighting emulation. These touches elevate the model from a clever mechanism to a faithful representation. The educational payoff comes when the builder can explain the reasoning behind the design choices. Consider a brief, practical narrative you can share with a viewer or a learner: the pump panel’s placement reflects a balance between accessibility and protection, the apparatus compartment’s organization enables rapid access to essential tools, the ladder’s deployment path is designed to minimize interference with the crew’s workflow, and the cab’s ergonomics prioritize driver visibility and control. This storytelling aspect makes the model unforgettable and reinforces the connection between form and function. For those who want to broaden their perspective beyond the hands-on work, it helps to consult professional resources, blueprints, and educational materials that illuminate how real fire apparatus are engineered. The NFPA standards, in particular, offer a framework for understanding the broader design constraints that govern emergency vehicles in the field. While your model does not need to meet these standards in a legal sense, they provide valuable benchmarks for scale, balance, and reliability. The journey from a basic craft to a sophisticated, educational model is about embracing a philosophy of realism without sacrificing safety or accessibility. The result is a project that not only looks like a fire truck but also embodies the principles that make real trucks effective tools in emergencies. It invites learners to explore mechanical systems, ergonomics, and modular design. It encourages experimentation with materials and mechanisms while reinforcing a respect for the constraints that professionals navigate every day. And it rewards curiosity with a tangible object that can be shown, touched, and discussed in meaningful ways. As you advance, you may find it useful to consult additional resources that connect classroom or hobby space to the field of emergency response design. The idea is to broaden understanding while maintaining a practical focus on what makes a model compelling: clarity of purpose, coherent mechanical behavior, and a faithful representation of the critical systems that underpin real-world operation. If you have a particular emphasis—such as a focus on hydraulics, on modular storage, or on dynamic features like a ladder—allow that emphasis to shape your build plan. The strongest projects emerge from narrowing a broad concept into specific, testable ideas. In the end, the challenge is to balance accuracy with playability, craftsmanship with safety, and educational depth with accessibility. The reward is a chapter of craftsmanship that reads as a tribute to the engineering excellence behind actual fire trucks while standing firmly on its own as a compelling, hands-on learning experience. The model becomes more than a toy; it becomes a platform for inquiry, a tool for teaching systems thinking, and a tangible reminder of the complexity and importance of emergency response design. For readers who wish to explore related topics or extend their project into broader contexts, the linked resources offer avenues for further study without distracting from the core craft. To reinforce the connection between this chapter and broader themes, consider visiting related content that explores steel construction, equipment organization, and the broader ecosystem of fire service technology. For authoritative standards and guidelines, consult the NFPA site at https://www.nfpa.org.
Final thoughts
In creating your own fire truck model, whether simple, creative, or advanced, you’re not just crafting an object; you’re celebrating the legacy and importance of firefighting. This hands-on experience deepens understanding and appreciation for the hard work and technology that goes into these lifesaving machines. We hope this guide has inspired you to roll up your sleeves and bring your fire truck vision to life!